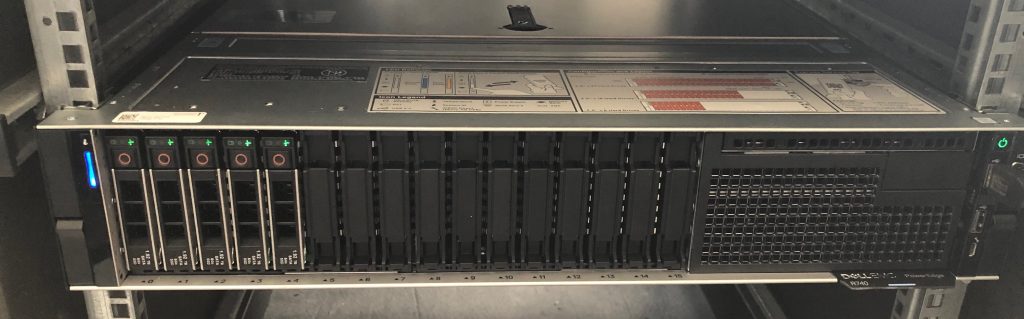
Recently we added an Nvidia Tesla P40 GPU to our Dell R740 machine which serves as a VMWare ESXi 6.5 host for several virtual machines and test lab for various purposes (e. g. this WordPress blog is running on a Ubuntu VM on this machine).
Our goal was to run Python with Keras/Tensorflow on the GPU in order to offer our students a state-of-the-art lab environment for machine learning, deep learning or data science projects. However, we experienced several challenges until it worked. If you’re in a comparable situation, you’ll maybe find something interesting in our findings.
VMWare vSphere / ESXi: Let the trouble begin
Having a running VMWare ESXi 6.5 host it seemed to be a nice idea to extend this machine with a costly GPU card because the GPU could be shared across several VMs and thus could be used by several users in separate VM environments. This idea in mind my first lesson learned is that there are basically two concepts to use a GPU in a VMWare host:
- vGPU: offers exactly the above possibilities (apparently)
- Pass-through: the GPU is passed more or less directly to just one VM that uses the GPU exclusively
The first concept (vGPU) seems to be quite a good idea, however, Nvidia charges some extra license fees for the VMWare add-ons necessary to use this. So far I haven’t further investigated the amount it would cost, maybe this will be an option in the future. In order to kickstart the GPU I thus chose the second deployment option and continued with the „pass-through“ mode. However, lots of documentation available on the net refers to the vGPU scenario and won’t help you in the pass-through mode.
Preparation of the Dell R740 VMWare host
While most of the configuration for virtualization is already configured in the default settings of your Dell machine, I stumbled across some additional settings that I had to change:
- I/OAT DMA Engine: enabled
- SR-IOV Global Enable: enabled
- Memory Mapped I/O above 4GB: enabled
- Memory Mapped I/O base: 12TB
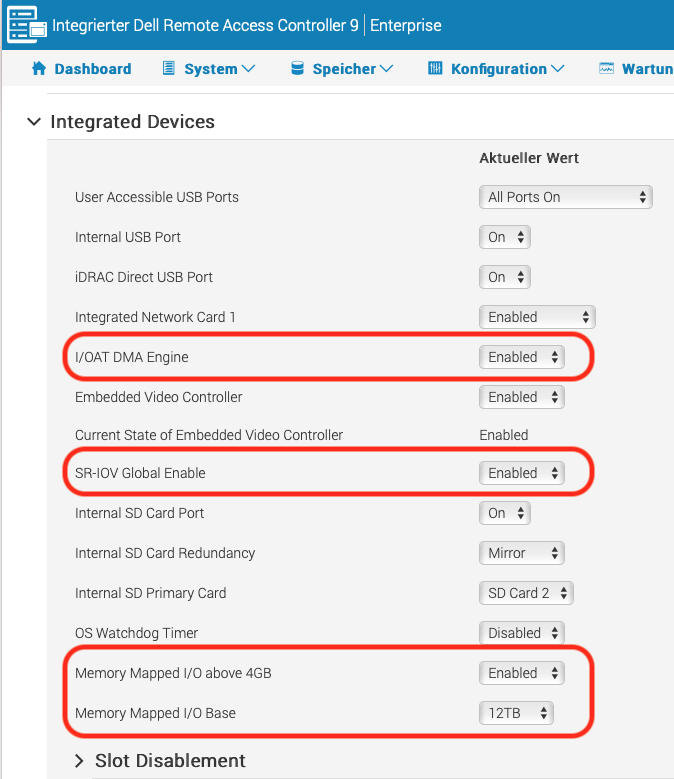
I’m not sure about the importance of each of these settings, but it is what I finally got when it worked (see links at the bottom for further references). Afterwards, a reboot is presumably necessary in order to activate the new settings.
Preparing ESXi 6.5 for GPU pass-through
Next step is to prepare ESXi for GPU pass-through. Navigate in the vSphere Web Client to the host config area, choose the „Hardware“ and „PCI devices“. You can use the filter element to find the Nvidia GPU, e. g. by typing „nvi“ in there (see screenshot).
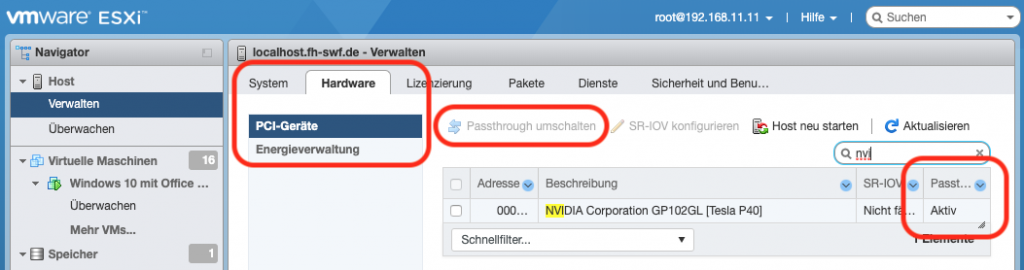
Make sure that „pass-through“ (column at the right) is „active“, otherwise select the entry and use the toggle-switch above the list in order to activate the pass-through mode for the GPU. Afterwards, a reboot is required.
A typical error message you may receive when one of the settings isn’t correct is
Failed to power on virtual machine […]. Module ‚DevicePowerOn‘ power on failed. Click here for more details.

Install Guest-OS: (U)EFI required
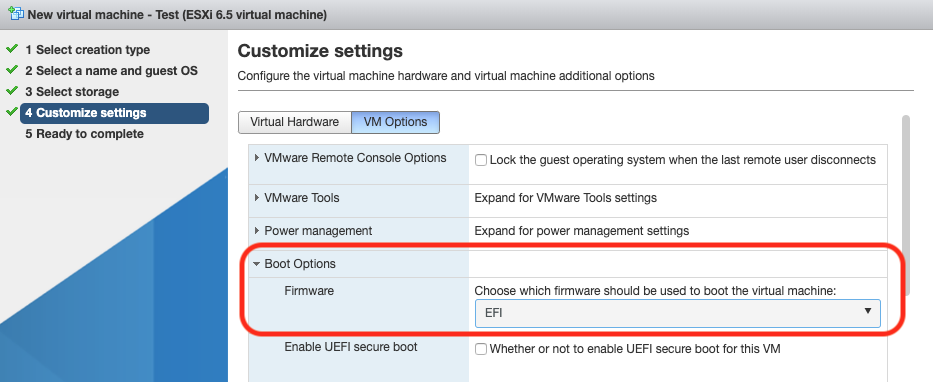
As mentioned in the VMWare blog post (reference see in the „Links“ section at the bottom) the Guest-OS must be installed in EFI/UEFI mode and not in BIOS mode. Since BIOS mode is the default setting (and marked as „recommended“) during the setup process of a new VM, you most probably will have to configure and install a new VM. Changing an existing VM from BIOS to EFI/UEFI unfortunately won’t work. During setup of a new VM you find the EFI option in the „VM Options“ tab and there in „Boot Options“:
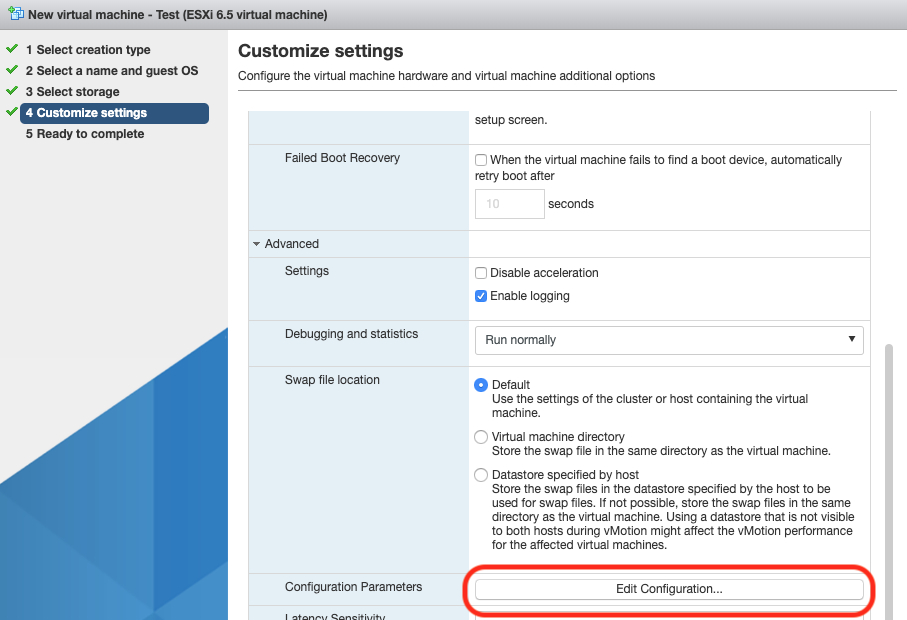
Having changed to „EFI“, scroll down to the „Advanced“ block and append two more options via the „Edit Configurations“ button:
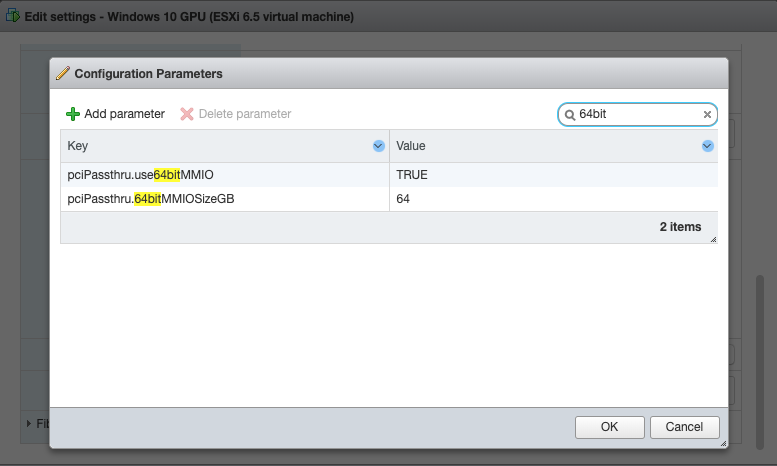
Following the Nvidia blog post you need there:
- pciPassthru.use64bitMMIO = ”TRUE”
- pciPassthru.64bitMMIOSizeGB = 64
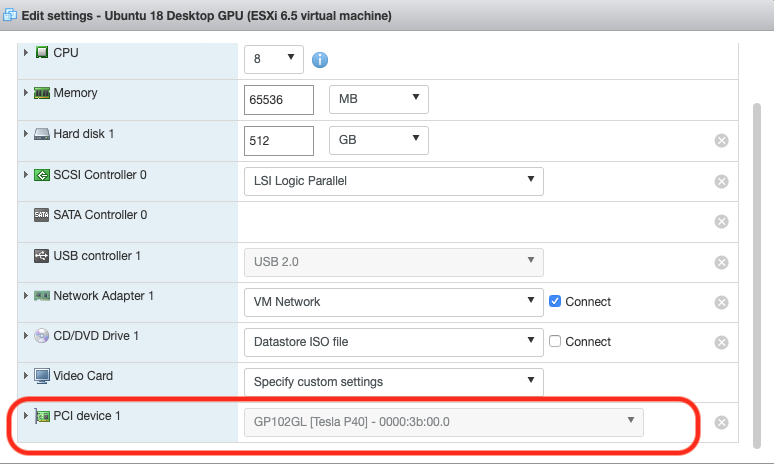
Configure and setup the virtual hardware as desired and (finally) don’t forget to add the GPU as additional PCI device:
Choosing the Guest-OS: Windows made my day
While my first idea was to use Ubuntu for the Python, Tensorflow, Keras development, I experienced severe problems during install and setup of a working environment, both with Ubuntu 16 and Ubuntu 18. I tried different install options (package manager, shell run, GUI setup) and several Nvidia driver versions. However, I always ended up with a
NVIDIA-SMI has failed because it couldn’t communicate with the NVIDIA driver
Since I hadn’t had the whole host, GPU, ESXi and VM setup running successfully so far, I decided to switch over to a Windows 10 guest OS in order to have a kind of „proof-of-concept“ that host and ESXi configuration is principally working. The further setup process on Windows went smoothly and the Tesla P40 showed up in the device manager section as unknown device. I followed the Nvidia driver download selection and ended up with
425.25-tesla-desktop-win10-64bit-international.exe
Afterwards, the „nvidia-smi“ tool showed what I already hoped to achieve with Ubuntu, but continuously failed:
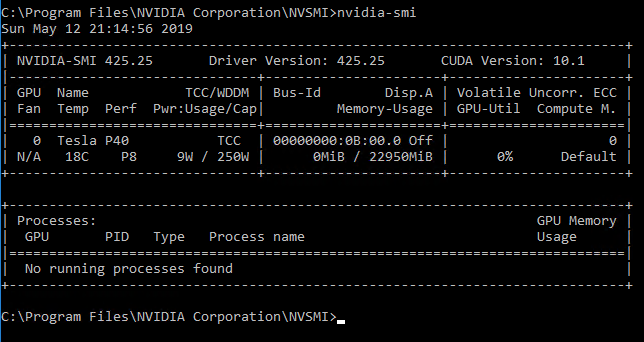
Windows made my day… 🙂
Kickstarting Tensorflow and Keras with CUDA
Having a well configured and installed Tesla P40 GPU at hand, now the Python environment had to be setup. In order to have the GPU support enabled you moreover need the CUDA library. I followed the guideline found at towardsdatascience.com with some changes due to newer versions of some of the software components and the official Nvidia CUDA installation guide (both links at the bottom). However, be careful and do not simply install the most current releases. Especially check at first, which CUDA Version is currently supported by the Tensorflow-GPU package. At the time of this blog post, Tensorflow (>=1.13) supports CUDA 10.0, though CUDA 10.1 was already released. Additionally download the matching cuDNN file.
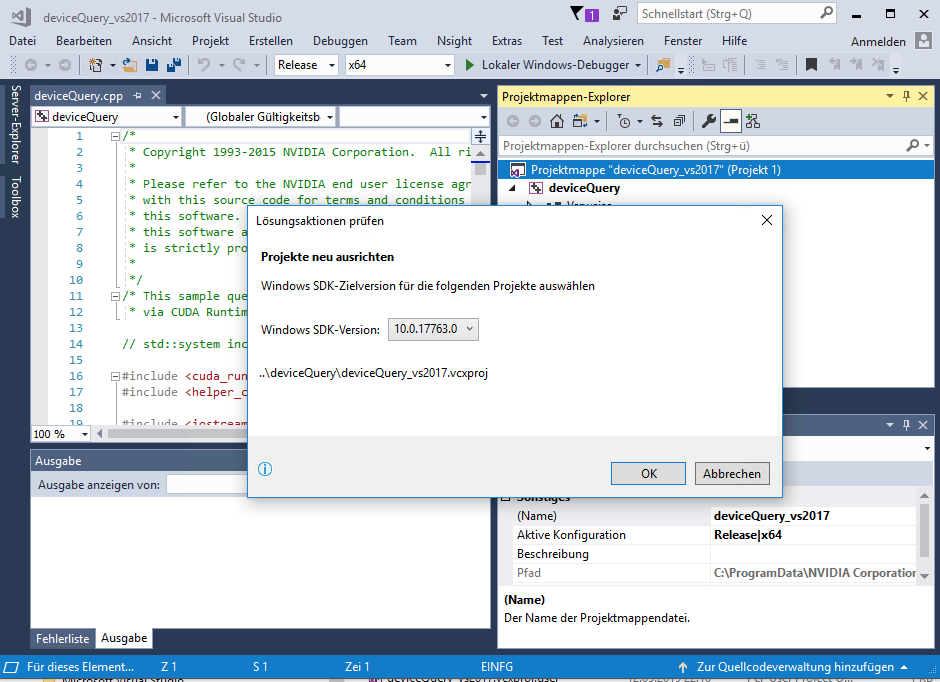
Please keep in mind that you also need a Visual Studio installation as Build environment. In my case I chose Visual Studio Professional 2017, but apparently the free community edition will do it as well. Don’t forget to extend the PATH variables as mentioned on towardsdatascience.com and on the Windows install guide on tensorflow.org. In order to be absolutely sure that now everything is working as intended, I checked some of the CUDA sample projects. The build process went more or less smoothly, only thing I had to do was to right-click the project in Visual Studio and to manually assign the actually installed Windows SDK to the project:
After building the project I checked the result and started the „deviceQuery.exe“:
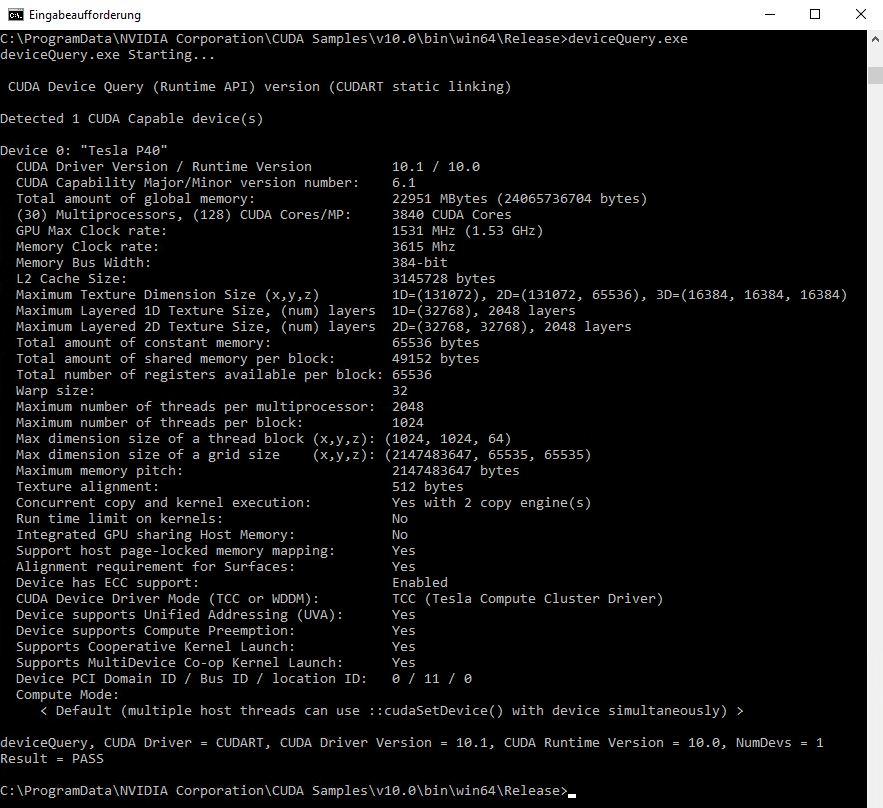
Fortunately, a success at last :-).
Anaconda and Tensorflow-GPU
Based on my Python experience so far, I recommend to use Anaconda as Python distribution. However, following the guide on towardsdatascience.com I did not succeed to install the tensorflow-gpu package with pip via
pip install tensorflow-gpu
Starting Python with
import Tensorflow
led to lengthy error messages, here the brief version
ImportError: DLL load failed: The specified module could not be found
From my point of view Conda as package manager again demonstrates its usefulness because a simple
conda install tensorflow-gpu
not only installed the tensorflow-gpu package, but also all its dependencies in the required and (most important) correct versions. Finally
conda install keras
installs Keras, so after lots of trial and error I finally got the Tesla P40 GPU in our Dell R740 on an ESXi 6.5 host with a Windows 10 guest running in Direct Passthrough mode.
Links and References
- Dell support note on GPU pass-through BIOS host config
- VMWare blog post on pass-through with ESXi 6.5
- VMWare article concerning guest OS requirements
- NVIDIA Driver download section
- Official Nvidia CUDA install guide for Windows platform
- towardsdatascience.com on setting up CUDA support for Python
- Windows setup guide for Tensorflow and CUDA with GPU support