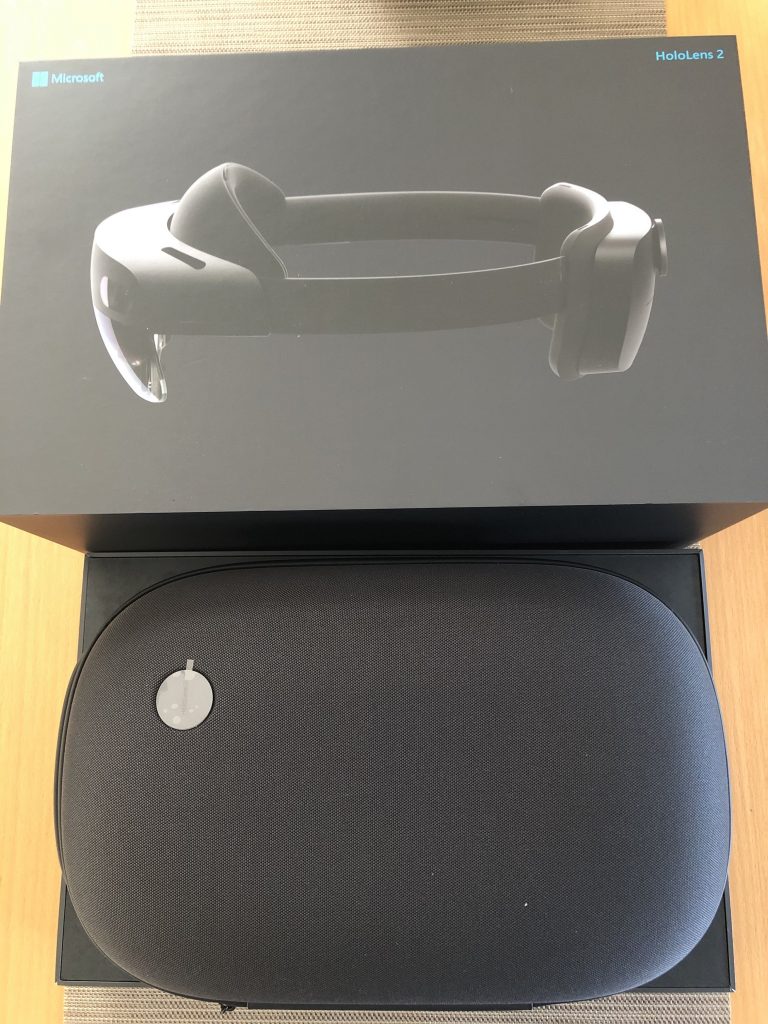
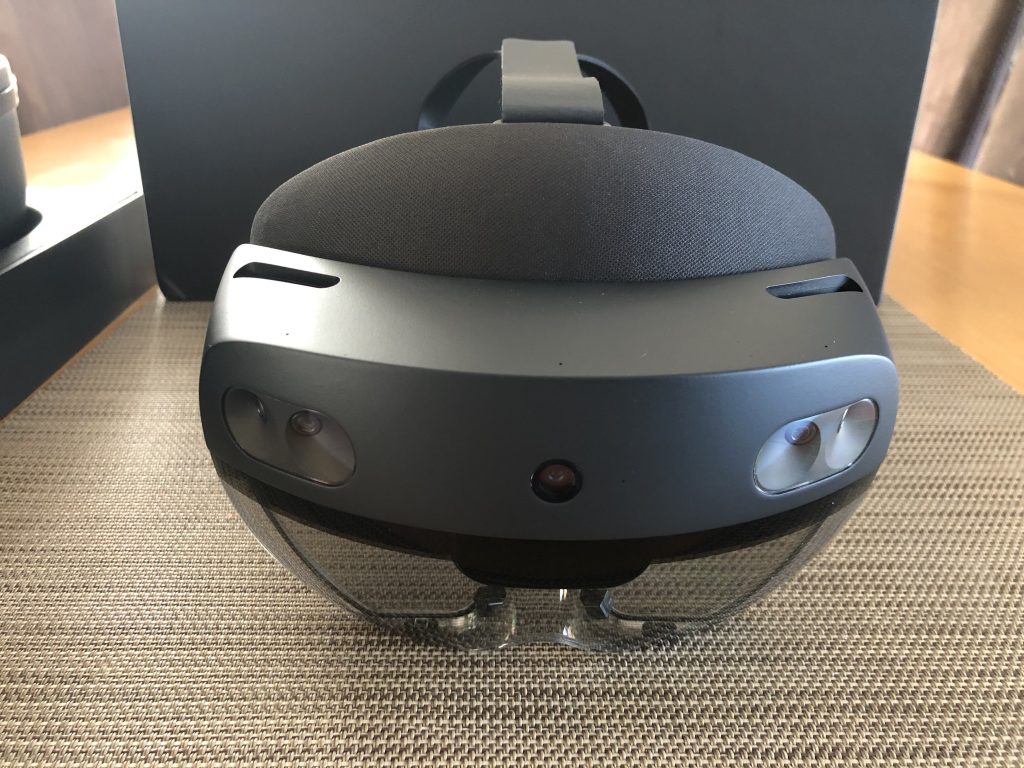
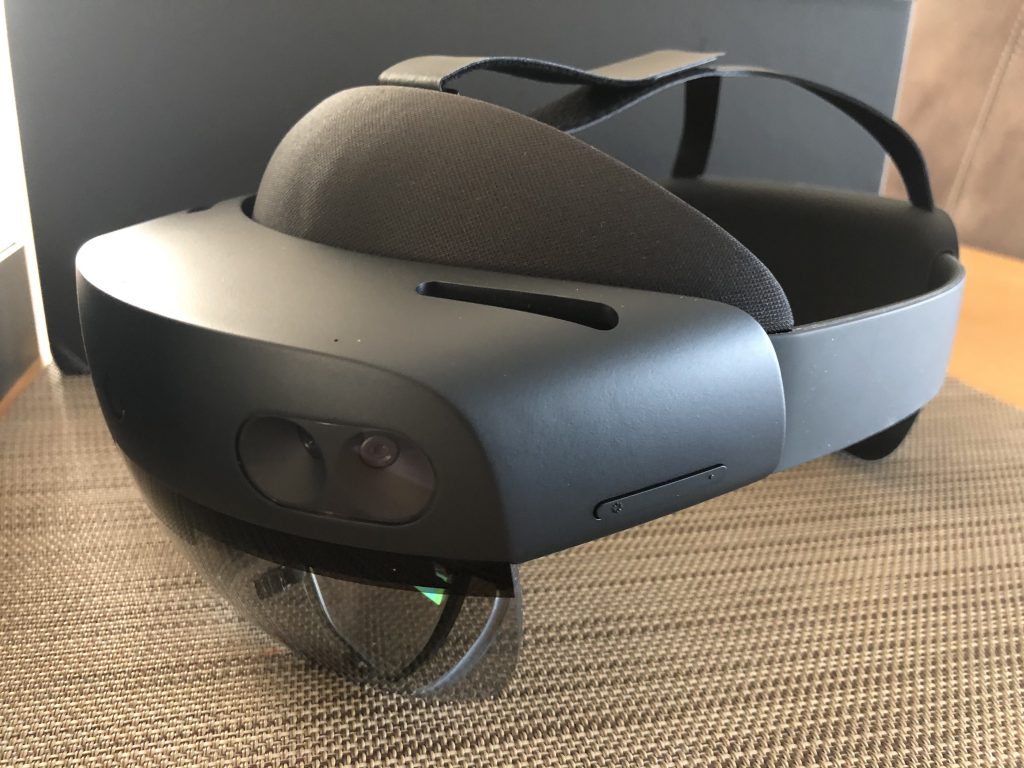
Auch in Corona-Zeiten bleiben wir am Ball: der Fachbereich TBW freut sich über eine neue Microsoft HoloLens 2 als Ergänzung zur aktuellen Laborausstattung. Nach mehrmonatigen Lieferzeiten ist sie endlich eingetroffen. Hier ein paar Fotos vom Unboxing.
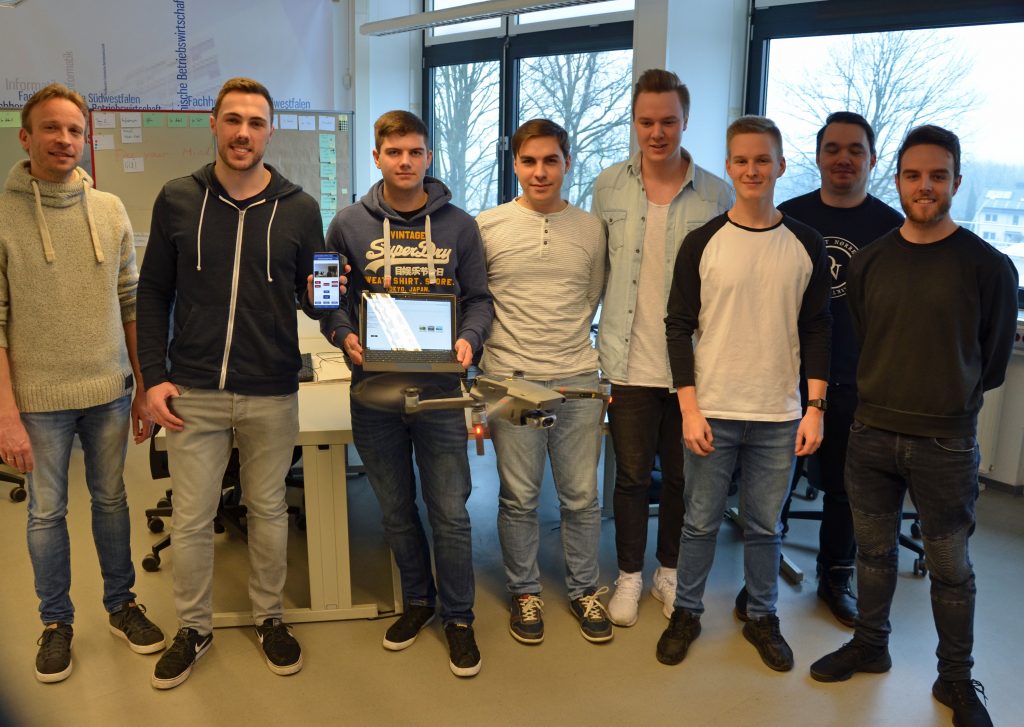
Die Hochschule berichtet in einer aktuellen Pressemitteilung über das erfolgreich angelaufene Projekt zur Programmierung einer Drohne für die Instandhaltung.
Django and Python can cause quite a headache in Windows environments. However, sometimes you have no choice and Windows is the OS that has to be used. It took me several hours, spent at googling, reading and testing until I got a configuration that worked in my setup. So, for anyone else in a similar situation I’d like to summarize my experiences.
The built-in web server in Django is really nice for developing and testing. However, it shouldn’t be used for a production setup. While there are a lot of tools for this purpose (e. g. uWSGI, Gunicorn), many of them are not available for Windows. The most appealing solution is most probably the usage of Docker which also works on Windows Server 2019. However, Docker requires Hyper-V for virtualization and since my Windows system is a VM itself, it depends on the configuration of the VM host whether Hyper-V is made available to the guest VMs or not.
An alternative that is most likely to work is Apache. All you have to do is to integrate your Apache installation with the Python/Django application. For all of the above mentioned solutions (and also for Apache) Django comes with a WSGI interface that bridges the web server to a Python application. On the Apache side you need a specific module, the „mod_wsgi“ module, that accomplishes the task. Unfortunately, this module is not shipped with a standard Apache distribution.
Basic setup
My setup is:
Windows Server 2019 Desktop (VM)
Python 3.8.1 64 bit
Apache 2.4.41 64 bit
PyCharm 2019.3.3
First of all, it seems to be important to have anything either 64 bits or 32 bits. Never mix it up!
I took the standard Python distribution which can be downloaded here. I installed Python as Administrator, added to PATH and installed it for „all users“. Use the „custom install“ and verify that the respective checkboxes are marked.
The Apache distribution may cause problems in combination with the other tools involved, so I downloaded it from Apachelounge. Extract it to „c:\apache24“, which seems to be the standard path that works out of the box for the other tools. I installed (that means copying from the archive) with my normal user account.
My pain points
First of all, I created a new Django project with PyCharm with its nice wizard. PyCharm supports three virtual environment managers, namely „virtualenv“, „pipenv“ and „conda“. For Django projects the Conda package manager is not recommended (don’t remember where I read it), „pipenv“ seems to cause trouble in combination for building the „mod_wsgi“ described later. So, there is only „virtualenv“ left. Something I learned at this point is that the current „virtualenv“ that is part of Python is actually „venv“. The real „virtualenv“ is a third-party package manager that has to be installed additionally. Moreover, for building „mod_wsgi“ it is recommended to use the third-party „virtualenv“ and not the built-in „venv“. However, when using PyCharm you have no choice, but to stick to the built-in „venv“.
PyCharm terminal issue
Setting up a new virtual environment with an empty Django project in PyCharm is a quick win. I had some issues when using the „terminal“ tab at the bottom of PyCharm because the virtualenv package information was different than the one I saw in project settings. There are some threads on the Jetbrains issue tracker concerning this problem. For the next steps it is safer to open a new command line shell, activate the virtualenv in this shell and to do the next steps in there. Double-check the actual virtual environment you are in.
Having read lots of hints it seems to be important to have the latest versions of (currently):
pip 20.0.2
setuptools 45.2.0
Moreover, virtualenv (the third-party one) is recommended, but I also succeeded with the build-in venv.
Building mod_wsgi
As mentioned above you need the „mod_wsgi“ for Apache in order to bridge the Apache web server with your Django application. Since this approach is several years old, you have to pay attention on the publishing date of articles and posts when googling this topic. For example, you could download the module pre-built for your platform, but lots of things may go wrong this way, leaving you with a non-working solution. Moreover, a lot of scenarios I found on the web concerning „mod_wsgi“, which promise to be very simple, are not applicable for Windows. So, my summary is that the best way is to build „mod_wsgi“ yourself, which is also recommended on the official webpage.
Fortunately, the build process is not difficult at all. You simply use „pip“ in your virtual environment:
pip install mod_wsgi
https://pypi.org/project/mod-wsgi/
Out of the box this approach won’t work because you need the respective toolset from Microsoft for the build process which can be found here. You actually only need the „build tools“, not Visual Studio. Scrolling down the page, you’ll find them in the „Tools for Visual Studio“ section. Maybe this direct download link works for you. Installing the „build tools“ you only need (presumably)
MSVC v142 – VS2019 C++ x64/x86-Buildtools
Windows 10 SDK
Having the build tools installed, you should give the „pip install mod_wsgi“ in your virtual environment a try. For me, it did not work :
Obviously, the build process does not find the Python libraries which are not part of the virtual environment where they seem to be expected. The issue seems to be quite new and could be solved for a while by using the third-party virtualenv. In this post the solution is to use the following pip-command instead:
That worked for me and I finally got „mod_wsgi“ built and ready to use. I suppose that this issue may be fixed in future releases. You can check the result out with the command:
mod_wsgi-express module-config
You’ll get an output like this:
You will need this output later on. There’s a lot more you could do with „mod_wsgi-express“. However, nothing else seems to work on Windows. On Unix systems for example you could use „mod_wsgi-express“ to spin up an own web server.
Apache trouble
Next step is to put the newly created „mod_wsgi“ module in your Apache installation. As mentioned before, you should only use the Apachelounge distribution and install/copy the files in „c:\apache24“. I also added the Apache-bin directory to the system path „c:\apache24\bin“, but I’m not sure whether that is of any use. I installed Apache as a Windows service with
httpd.exe -k install
In my setup I maintained the Apache settings in the „httpd.conf“ (in the „apache24\conf“ directory) and in the „httpd-vhosts.conf“ (in the „apache24\conf\extra“ directory). My vhosts contains the following:
Based on the guidelines you should copy the output you receive from the „mod_wsgi-express module-config“ (see above) into the „httpd.conf“ file. Having googled lots of web pages I often found a „LoadFile“ directive, which is missing in my output (does not seem to matter).
I inserted the output in my „httpd.conf“ and tried to restart the Apache service using the „Services“ dialog (start as Administrator), but failed. The Apache service could not be started and threw an error message. I tried lots of things and finally ended up with this working solution:
Deactivate (delete/comment) the „WSGIPythonHome“ in „httpd.conf“. I succeeded with just the „LoadModule wsgi_module“ directive (copy/paste from mod_wsgi-express)
Remove any „WSGIPythonPath“ directives
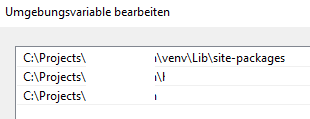
Added a PYTHONPATH to the system-wide environment variables for the virtual environment site-package path, the Django project directory and the Django app directory (where the „wsgi.py“ is located):
For me it’s still a mystery why the „WSGIPythonHome“ and the „WSGIPythonPath“ directives haven’t worked or which values would have been correct to fill in. Obviously they made Apache crash on startup.
I’d like to emphasize that I didn’t change the standard „wsgi.py“ generated by Django. I’ve seen quite a lot of solutions modifying this file with the goal to activate the virtual environment from within the „wsgi.py“. That does not work in the built-in virtualenv because the „activate_this.py“ script is not available. Moreover, it is not necessary in this configuration because the „mod_wsgi“ already belongs to the virtual environment.
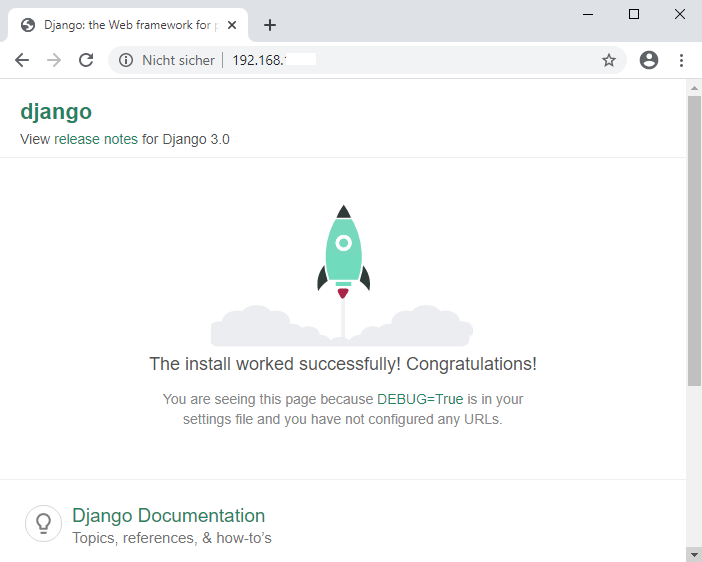
Finally with Apache and the PYTHONPATH defined, my Django installation is accessible via Apache:
Im kommenden Sommersemester biete ich zwei Wahlpflichtmodule (Sondergebiete):
SAP ABAP
ABAP ist die interne Programmiersprache von SAP. Immer dann, wenn der SAP-Standard und Customizing/Konfiguration nicht mehr ausreichen, um spezifische Anforderungen im Unternehmen abzudecken, kommt im SAP-Umfeld mit hoher Wahrscheinlichkeit der Bedarf nach einer Eigenentwicklung in ABAP auf.
Im Rahmen dieses Sondergebiete-Moduls lernen Sie die Programmiersprache ABAP kennen, die Entwicklungsumgebung von SAP (SE80) und entwickeln erste eigene Programme (Reports). Ausblicksweise lernen Sie außerdem, wie Entwicklungen in SAP in einer Drei-System-Landschaft bestehend aus Entwicklungs-, Test- und Produktivsystem organisiert sind und mit dem SAP Solution Manager unterstützt werden.
Industrie 4.0 mit SAP
In diesem Modul setzen wir die Fischertechnik Fabriksimulation in Verbindung mit SAP Leonardo, SAP HANA, SAP S/4HANA und SAP MI ein, um typische Szenarien der Industrie 4.0 wie Predictive Maintenance, Losgröße 1 oder Internet-of-Things (IoT) anhand eines anschaulichen Beispiels kennenzulernen.
Das Modul kann sowohl als „Sondergebiete Informatik“ als auch als „Sondergebiete Ingenieurwissenschaften“ eingebracht werden.
Programmierprojekt im Wintersemester 2019/20: Effizienzsteigerung in der Instandhaltung durch Bild- und Videoaufnahmen mit Drohnen
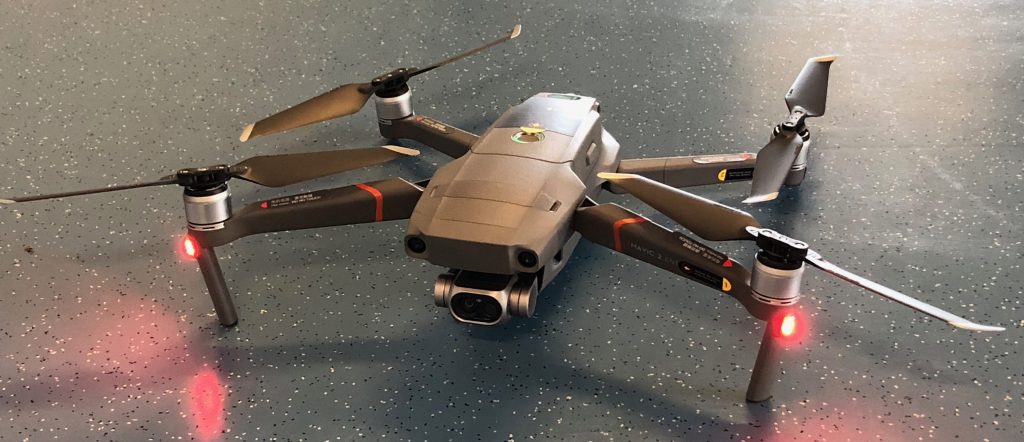
DJI Mavic 2 Enterprise Dual Drohne
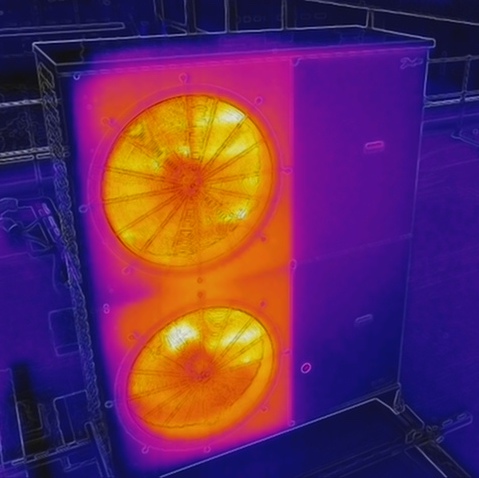
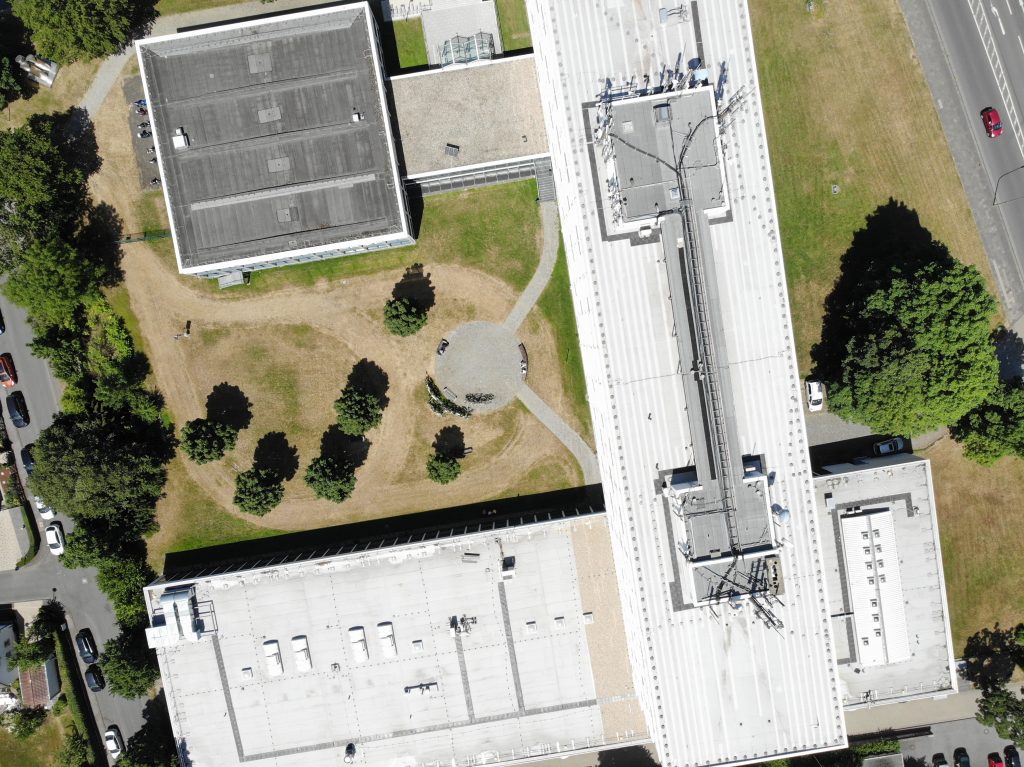
Regelmäßige Inspektionen und Sichtprüfungen sind feste Bestandteile vieler Anlagen und Maschinen im Rahmen der Instandhaltung, teilweise sogar auf Grundlage gesetzlicher Vorgaben, z. B. im Rahmen der Arbeits- oder Umweltsicherheit. Aufwändig und damit auch teuer wird es für Unternehmen, wenn die Anlagen entweder nicht ohne weiteres oder nur mit großem Aufwand (z. B. Gerüst) zugänglich sind: auf Dächern, bei Oberleitungen, Windkraftanlagen, Antennenanlagen etc.
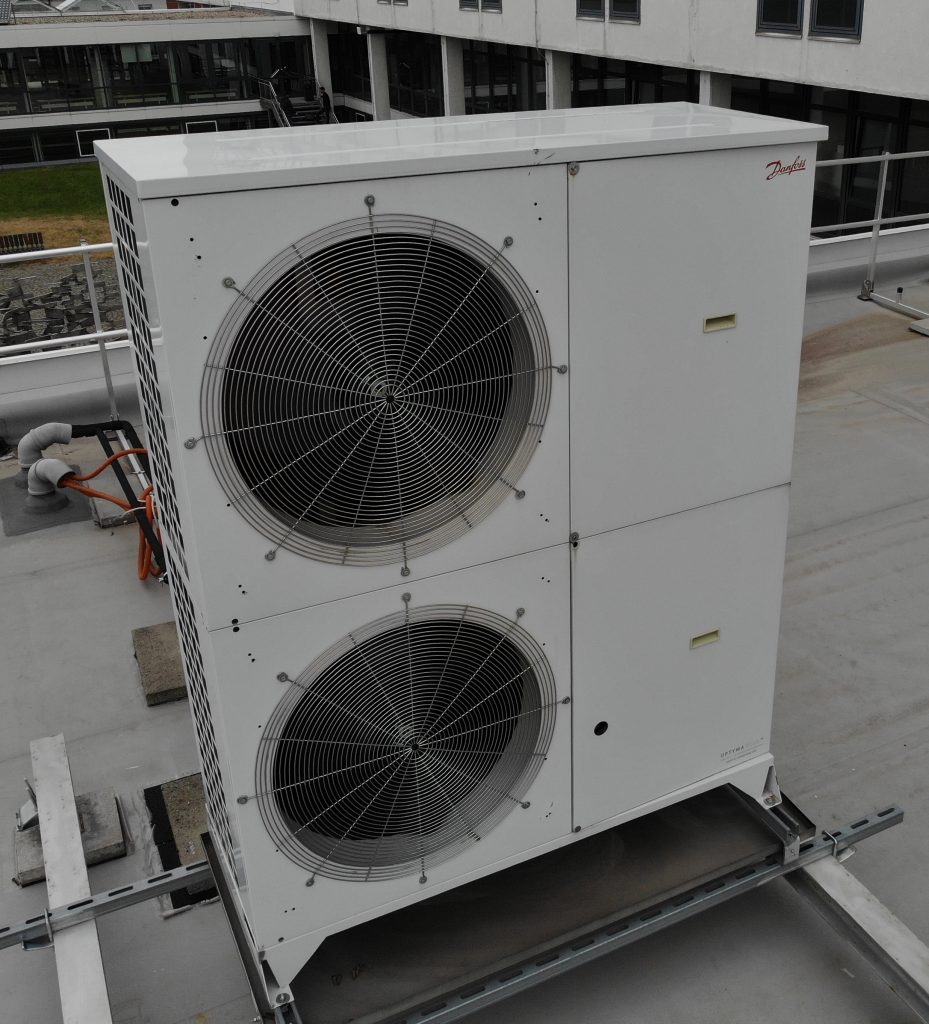
Aufnahme eines Klimageräts auf einem Dach per Drohne
Wärmebildaufnahme des Klimageräts
Programmierprojekt im Modul „Informationsmanagement“ im WS 2019/20
Der Schwerpunkt im Modul „Informationsmanagement“ liegt auf der Entwicklung einer Datenbank-gestützten Anwendung. Im kommenden Semester möchten wir mit allen Studierenden ein gemeinschaftliches Projekt für das oben beschriebene Anwendungsszenario erstellen:
Es wird angenommen, dass genaue Orts- und GPS-Informationen von technischen Anlagen in der Datenbank eines Informationssystems vorhanden sind bzw. hinterlegt werden können. Dies könnte z. B. in der Technischen Platz Struktur eines SAP ERP-Systems erfolgen (Modul PM: Plant Maintenance).
Die Drohne wird über ein mobiles Endgerät (Android- oder iOS-basiert), das an die Fernbedienung der Drohne angeschlossen ist, gesteuert. Über eine neu zu entwickelnde App erfolgt die Steuerung der Drohne teil-automatisiert zu den richtigen Koordinaten der zu inspizierenden Anlagen. Der menschliche Pilot überwacht lediglich noch den Flug und greift in Ausnahmesituationen ein.
Die App automatisiert die Aufnahme von Videos, Fotos und Wärmebildern an den richtigen Stellen und sendet diese zurück.
Ein/e Instandhalter/in nimmt die Sichtprüfung über die Bilder und Videos vor. Im Bedarfsfall kann eine Instandhaltungsaktion auf Basis der Bild- und Videoaufnahmen erfolgen (z. B. Anlegen einer Instandhaltungsmeldung mit Fotos/Video in einem SAP ERP-System). Auch die Einbindung als Rundgangsplanung („Inspection Rounds“) im SAP EAM erscheint denkbar, wäre dann allerdings eher ein Rundflug :-).
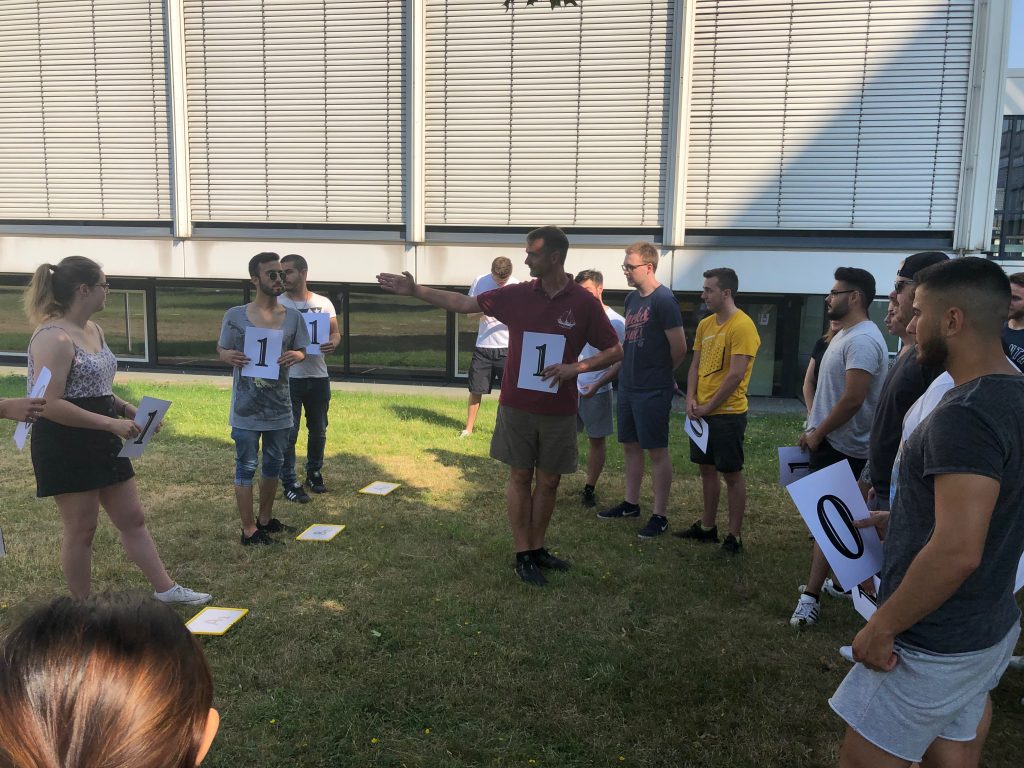
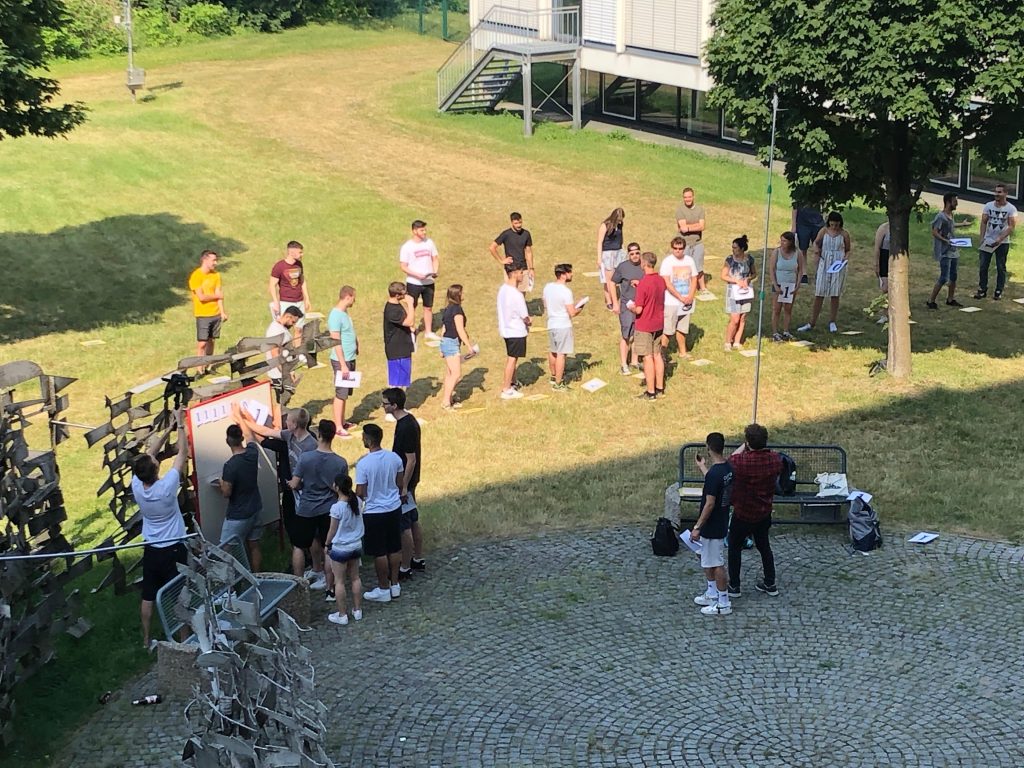
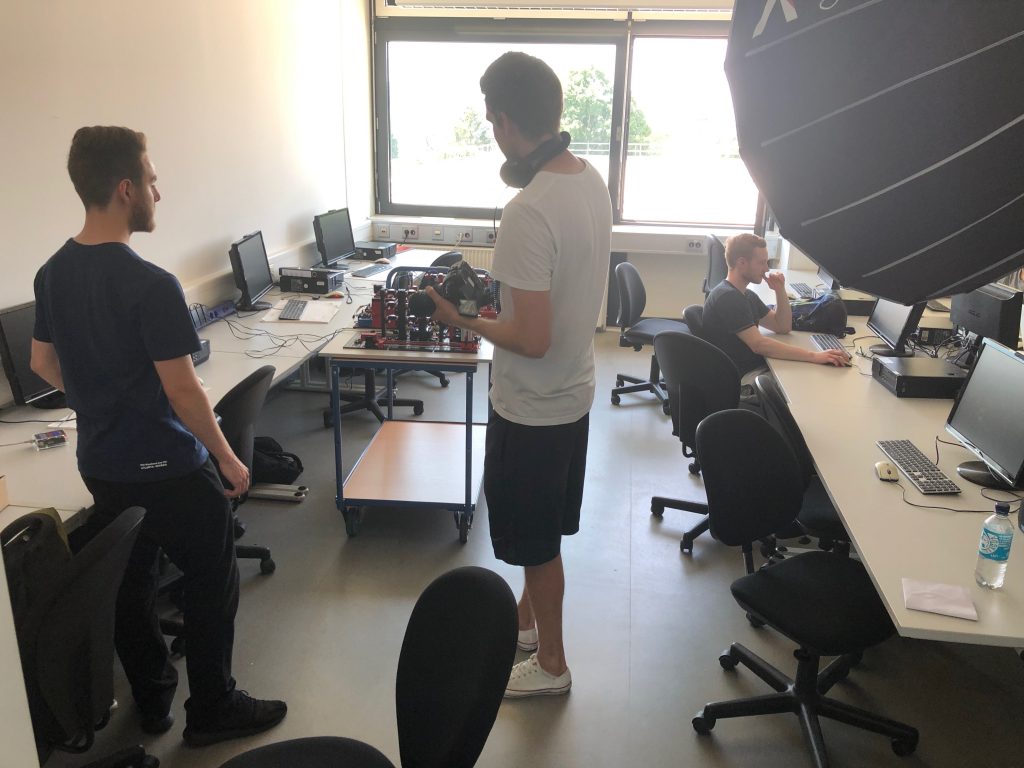
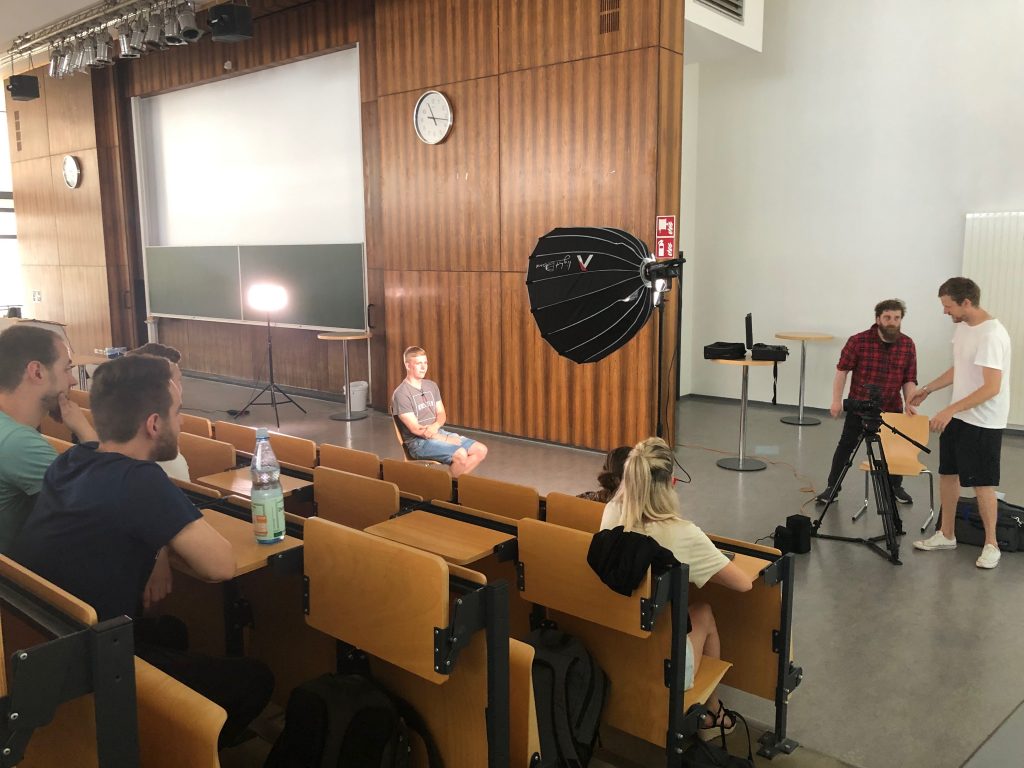
Am 26. Juni hieß es „Film ab“ in der Haldener Straße. Bei bestem Wetter und leider auch sehr hohen Temperaturen startete der Dreh eines neuen Imagefilms für den Studiengang Wirtschaftsinformatik.
Mit reger Unterstützung vieler Studierender und Dozenten, des Presse- und Marketingteams sowie des FH-eigenen Filmteams wurden typische Szenen aus dem Studienalltag, zu unseren hochmodernen Laboren und Geräten sowie viele O-Töne von Studierenden aus unterschiedlichen Semestern eingefangen.
Den Anfang machte das Modul „Rechnersysteme und Rechnernetze“, wo das sonnige Wetter genutzt wurde, um im Innenhof der FH eine Binäraddition ohne Computer auf der Wiese nachzustellen. Informatiker fühlen sich auch an der frischen Luft ganz wohl :-).
Weiter ging es durch verschiedene Labore und mit O-Tönen rund um das Studium.
Quintessenz des Films: Wirtschaftsinformatik ist vielseitig und nie langweilig!
An dieser Stelle sei noch einmal allen Beteiligten für ihr Engagement und Durchhaltevermögen angesichts der Temperaturen gedankt! Aufgrund weiterer eingeplanter Szenen außerhalb der FH und der bevorstehenden Ferienzeit wird der finale Schnitt wohl bis Oktober auf sich warten lassen.
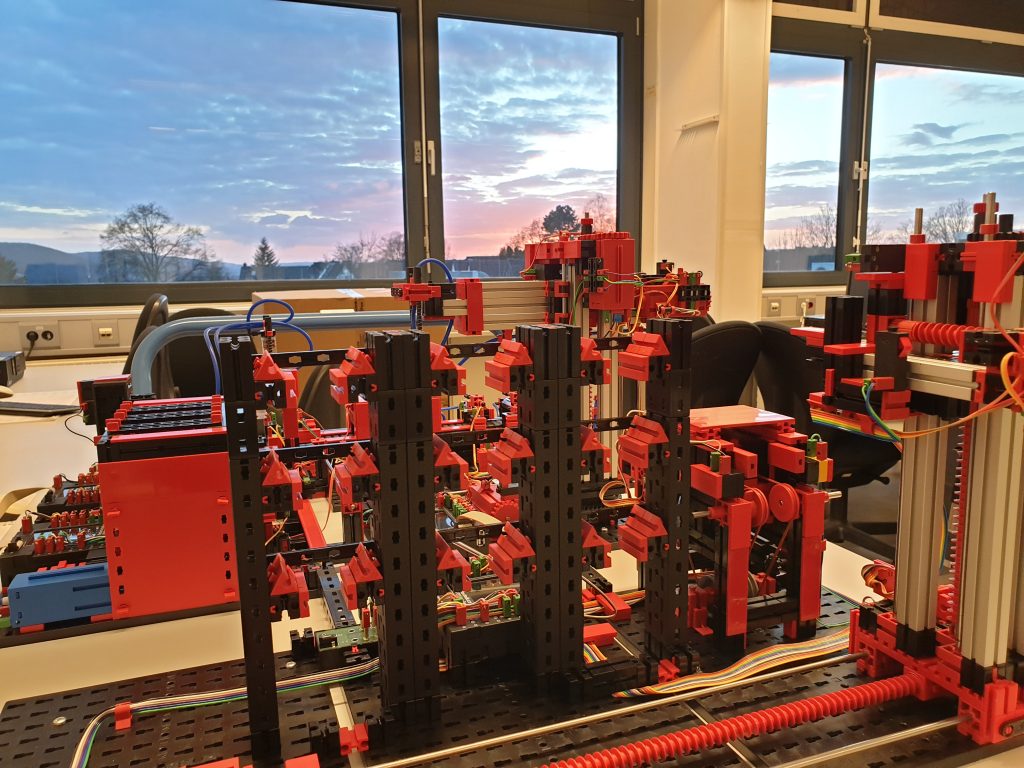
Im kommenden Wintersemester 2019/20 biete ich wieder als Wahlpflichtfach im Rahmen „Sondergebiete Informatik“ oder „Sondergebiete Ingenieurwissenschaften“ das Modul „Industrie 4.0 und Internet-of-Things mit SAP und der Fischertechnik Fabriksimulation“ an.
Fischertechnik Fabriksimulation: Vorne im Bild das Hochregallager mit automatischen Regalbediengerät. Hinten: Strahlend blauer Himmel über Hagen.
Inhaltlich werden wir uns mit Informationssystemen für die Industrie 4.0 beschäftigten und die Konzepte beispielhaft mit SAP-Systemen anhand der Fischertechnik Fabriksimulation nachvollziehen.
Losgröße 1: Kundenindividuelle Fertigung
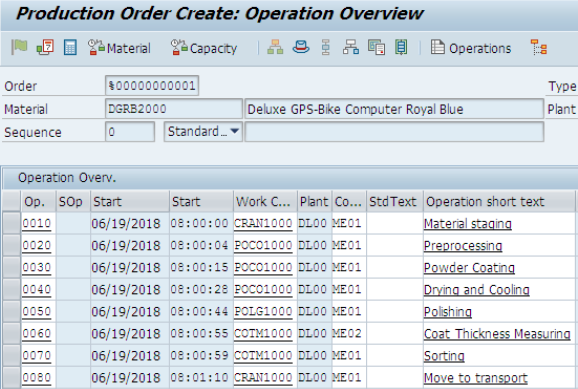
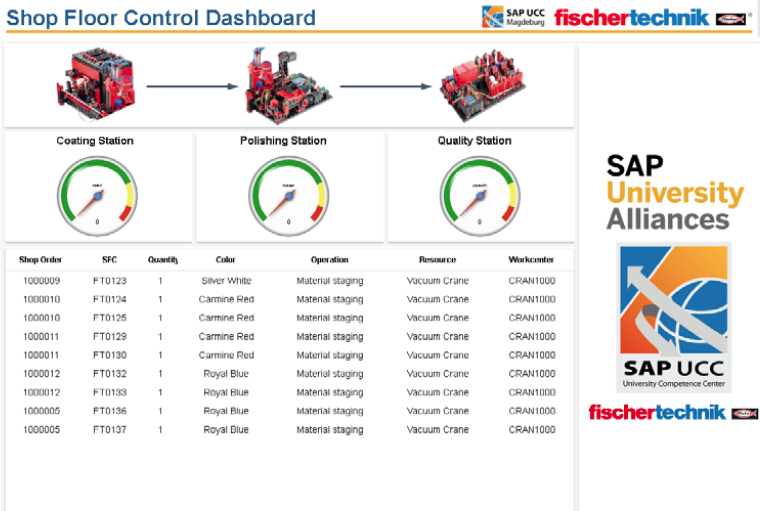
Im ersten Anwendungsszenario beschäftigen wir uns mit der kundenindividuellen Fertigung („Losgröße 1“). Ein Kundenauftrag wird im SAP S/4HANA angelegt, an ein SAP Manufacturing Execution (ME) übergeben und anschließend als Fertigungsauftrag in der Fabriksimulation entsprechend Kundenvorgabe hergestellt.
Die Steuerung der Fischertechnik-Anlage übernimmt dabei ein Raspberry PI Kleincomputer, der die verschiedenen Controller von Fischertechnik steuert.
Predictive Maintenance / Internet-of-Things
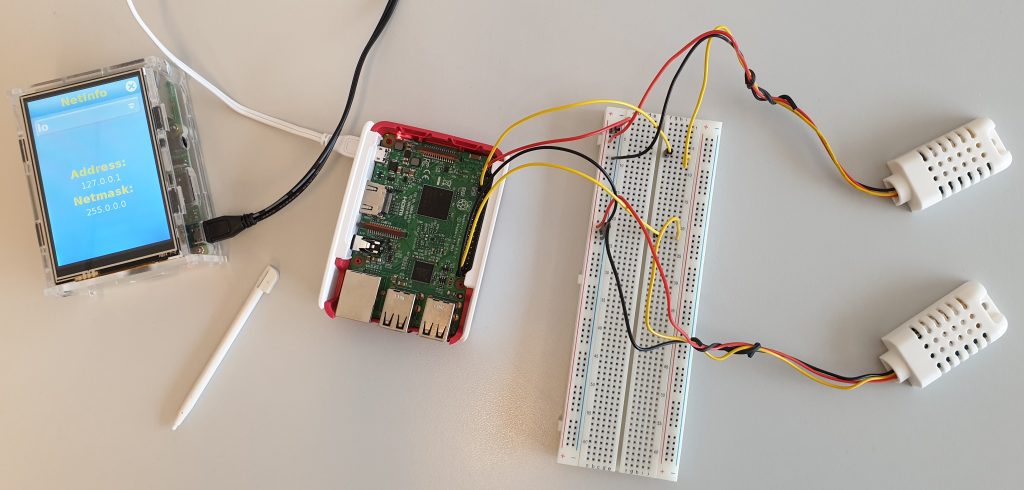
Raspi zur Anlagensteuerung (links) und zur Messwert-Erfassung (Mitte). Rechts zwei Sensoren zur Temperatur- und Luftfeuchtigkeitserfassung.
Im zweiten Anwendungsszenario werden Messwerte in der Fischertechnik-Anlage mit einem Raspberry PI und daran angeschlossenen Sensoren (Temperatur und Luftfeuchtigkeit) erfasst und fortlaufend an eine SAP HANA Datenbank gestreamt. In der HANA-Datenbank wird ein Regelkreis definiert, der dazu führt, dass bei einer definierten Überschreitung von Sensorwerten automatisch eine Instandhaltungsmeldung und -auftrag im SAP S/4HANA erzeugt wird, die dafür sorgt, dass die Anlage durch die Instandhaltung überprüft wird.
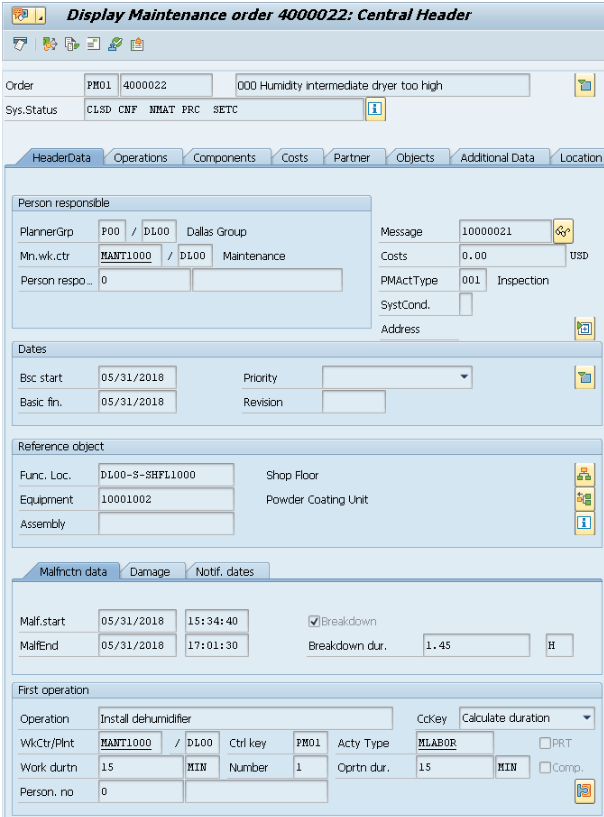
Instandhaltungsauftrag (PM Order) in S/4HANA
Zielgruppe und Durchführung
Das Modul richtet sich sowohl an Wirtschaftsinformatiker als auch an Wirtschaftsingenieure, die Interesse an den Konzepten der Industrie 4.0 und deren Umsetzung mit SAP-Produkten haben. Spezielle Programmierkenntnisse sind nicht erforderlich. Die Durchführung ist als zweitägiges Blockseminar nach der Vorlesungszeit geplant (Februar 2019), die Prüfungsleistung besteht aus einer Hausarbeit zum Themenkomplex.
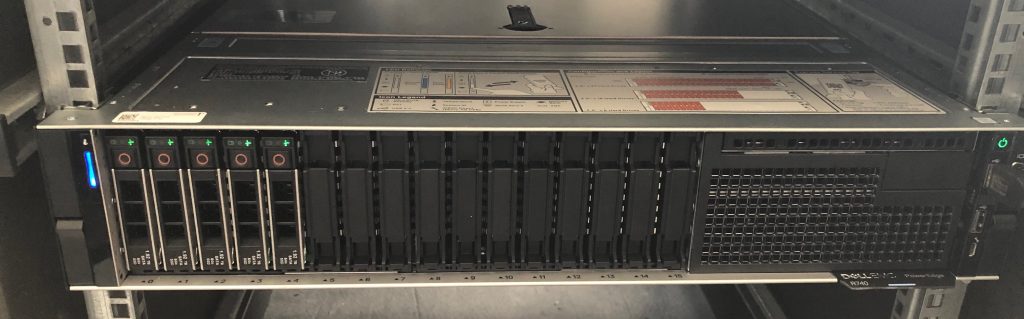
Recently we added an Nvidia Tesla P40 GPU to our Dell R740 machine which serves as a VMWare ESXi 6.5 host for several virtual machines and test lab for various purposes (e. g. this WordPress blog is running on a Ubuntu VM on this machine).
Dell EMC R740 in TBW computer lab in Hagen
Our goal was to run Python with Keras/Tensorflow on the GPU in order to offer our students a state-of-the-art lab environment for machine learning, deep learning or data science projects. However, we experienced several challenges until it worked. If you’re in a comparable situation, you’ll maybe find something interesting in our findings.
VMWare vSphere / ESXi: Let the trouble begin
Having a running VMWare ESXi 6.5 host it seemed to be a nice idea to extend this machine with a costly GPU card because the GPU could be shared across several VMs and thus could be used by several users in separate VM environments. This idea in mind my first lesson learned is that there are basically two concepts to use a GPU in a VMWare host:
vGPU: offers exactly the above possibilities (apparently)
Pass-through: the GPU is passed more or less directly to just one VM that uses the GPU exclusively
The first concept (vGPU) seems to be quite a good idea, however, Nvidia charges some extra license fees for the VMWare add-ons necessary to use this. So far I haven’t further investigated the amount it would cost, maybe this will be an option in the future. In order to kickstart the GPU I thus chose the second deployment option and continued with the „pass-through“ mode. However, lots of documentation available on the net refers to the vGPU scenario and won’t help you in the pass-through mode.
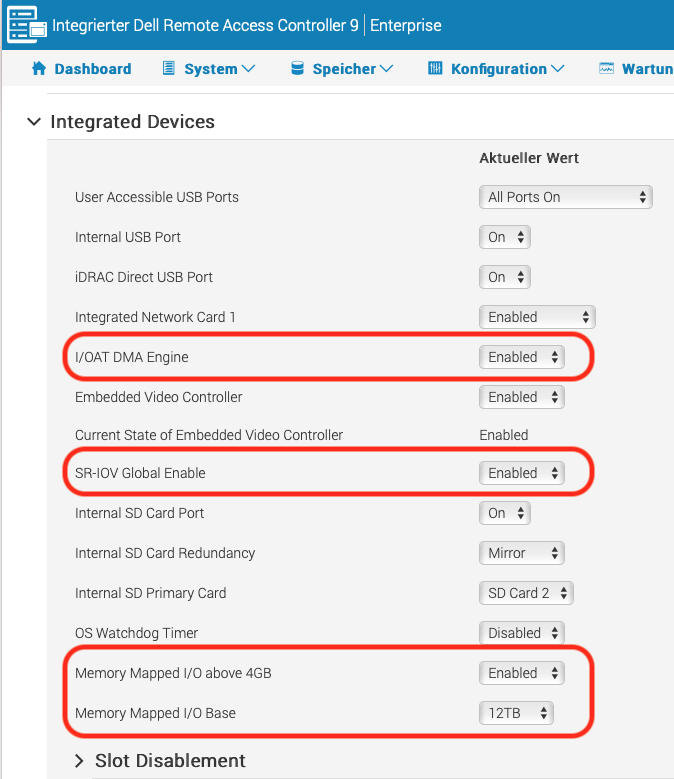
Preparation of the Dell R740 VMWare host
While most of the configuration for virtualization is already configured in the default settings of your Dell machine, I stumbled across some additional settings that I had to change:
I/OAT DMA Engine: enabled
SR-IOV Global Enable: enabled
Memory Mapped I/O above 4GB: enabled
Memory Mapped I/O base: 12TB
DellEMC R740 BIOS in iDRAC
I’m not sure about the importance of each of these settings, but it is what I finally got when it worked (see links at the bottom for further references). Afterwards, a reboot is presumably necessary in order to activate the new settings.
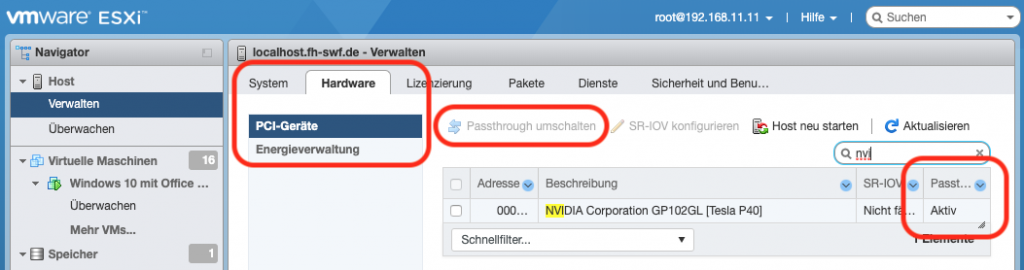
Preparing ESXi 6.5 for GPU pass-through
Next step is to prepare ESXi for GPU pass-through. Navigate in the vSphere Web Client to the host config area, choose the „Hardware“ and „PCI devices“. You can use the filter element to find the Nvidia GPU, e. g. by typing „nvi“ in there (see screenshot).
Finding the Nvidia GPU in the PCI devices list
Make sure that „pass-through“ (column at the right) is „active“, otherwise select the entry and use the toggle-switch above the list in order to activate the pass-through mode for the GPU. Afterwards, a reboot is required.
A typical error message you may receive when one of the settings isn’t correct is
Failed to power on virtual machine […]. Module ‚DevicePowerOn‘ power on failed. Click here for more details.
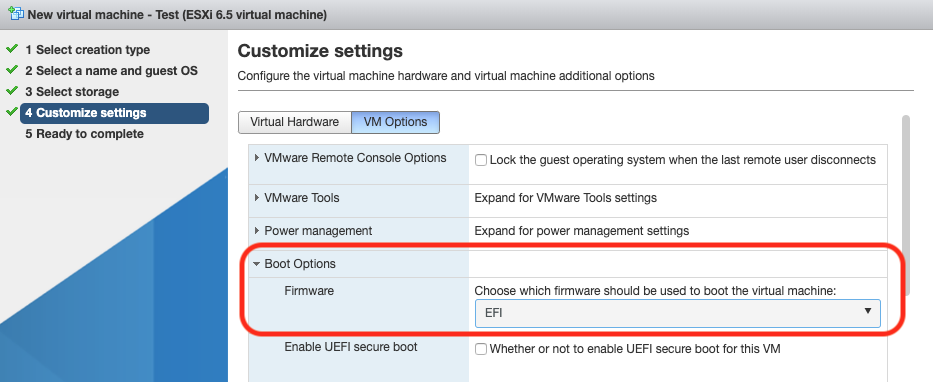
Install Guest-OS: (U)EFI required
As mentioned in the VMWare blog post (reference see in the „Links“ section at the bottom) the Guest-OS must be installed in EFI/UEFI mode and not in BIOS mode. Since BIOS mode is the default setting (and marked as „recommended“) during the setup process of a new VM, you most probably will have to configure and install a new VM. Changing an existing VM from BIOS to EFI/UEFI unfortunately won’t work. During setup of a new VM you find the EFI option in the „VM Options“ tab and there in „Boot Options“:
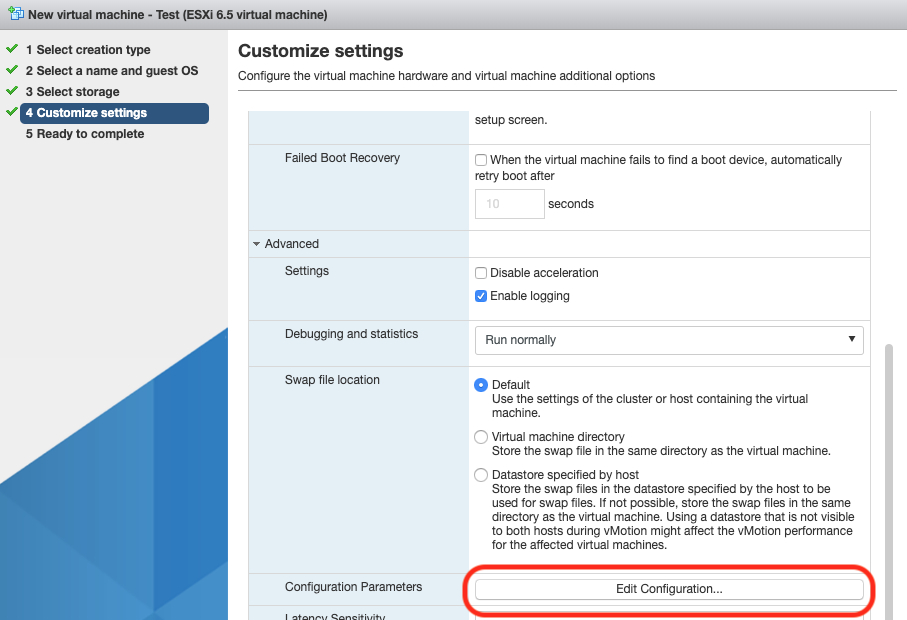
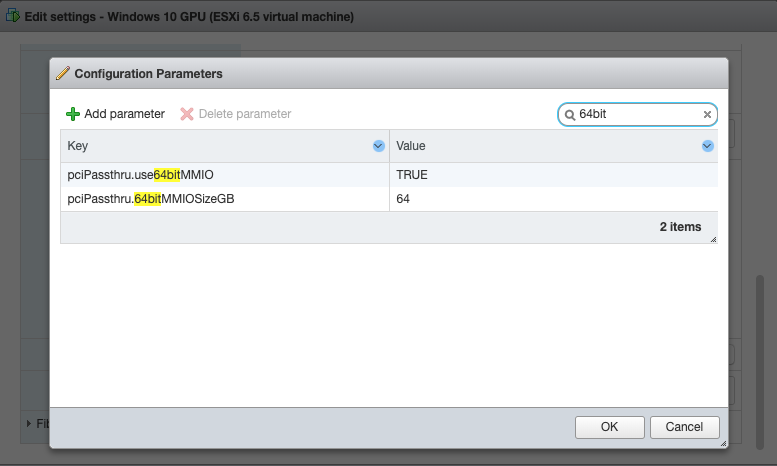
Having changed to „EFI“, scroll down to the „Advanced“ block and append two more options via the „Edit Configurations“ button:
Following the Nvidia blog post you need there:
pciPassthru.use64bitMMIO = ”TRUE”
pciPassthru.64bitMMIOSizeGB = 64
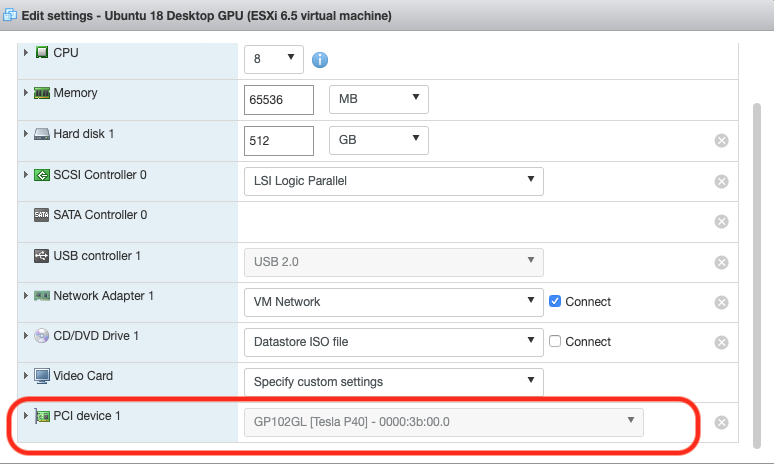
Configure and setup the virtual hardware as desired and (finally) don’t forget to add the GPU as additional PCI device:
Choosing the Guest-OS: Windows made my day
While my first idea was to use Ubuntu for the Python, Tensorflow, Keras development, I experienced severe problems during install and setup of a working environment, both with Ubuntu 16 and Ubuntu 18. I tried different install options (package manager, shell run, GUI setup) and several Nvidia driver versions. However, I always ended up with a
NVIDIA-SMI has failed because it couldn’t communicate with the NVIDIA driver
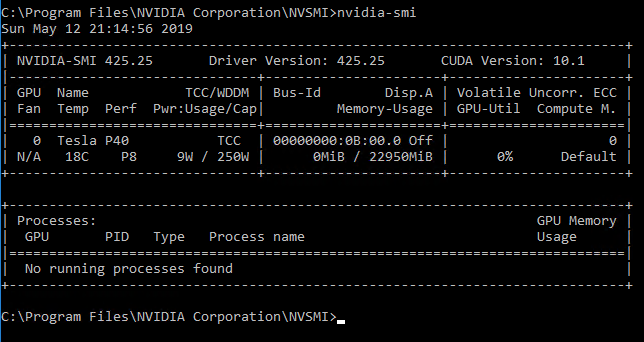
Since I hadn’t had the whole host, GPU, ESXi and VM setup running successfully so far, I decided to switch over to a Windows 10 guest OS in order to have a kind of „proof-of-concept“ that host and ESXi configuration is principally working. The further setup process on Windows went smoothly and the Tesla P40 showed up in the device manager section as unknown device. I followed the Nvidia driver download selection and ended up with
Afterwards, the „nvidia-smi“ tool showed what I already hoped to achieve with Ubuntu, but continuously failed:
Windows made my day… 🙂
Kickstarting Tensorflow and Keras with CUDA
Having a well configured and installed Tesla P40 GPU at hand, now the Python environment had to be setup. In order to have the GPU support enabled you moreover need the CUDA library. I followed the guideline found at towardsdatascience.com with some changes due to newer versions of some of the software components and the official Nvidia CUDA installation guide (both links at the bottom). However, be careful and do not simply install the most current releases. Especially check at first, which CUDA Version is currently supported by the Tensorflow-GPU package. At the time of this blog post, Tensorflow (>=1.13) supports CUDA 10.0, though CUDA 10.1 was already released. Additionally download the matching cuDNN file.
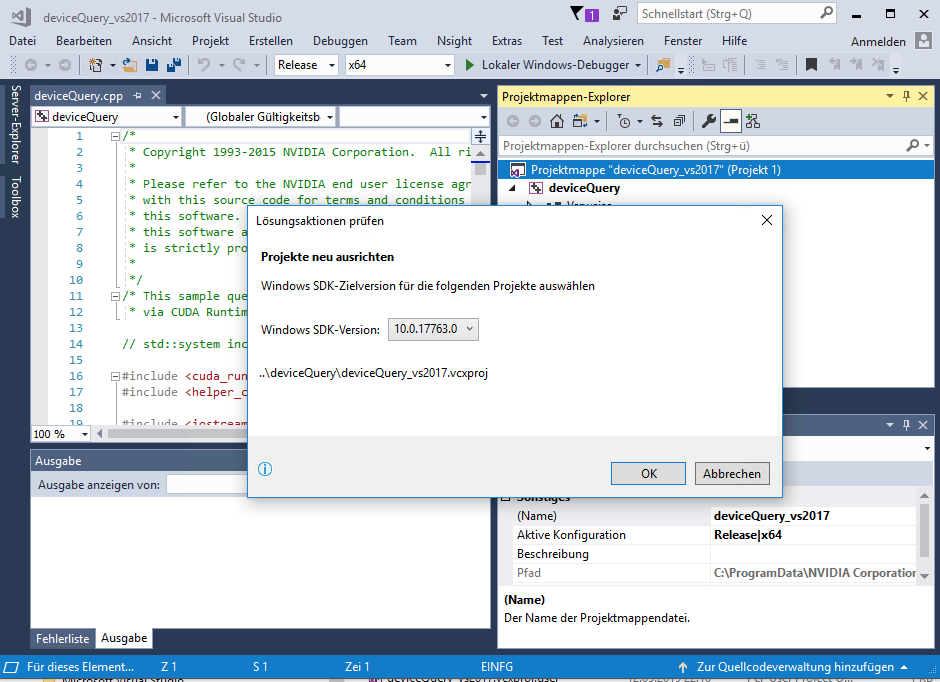
Please keep in mind that you also need a Visual Studio installation as Build environment. In my case I chose Visual Studio Professional 2017, but apparently the free community edition will do it as well. Don’t forget to extend the PATH variables as mentioned on towardsdatascience.com and on the Windows install guide on tensorflow.org. In order to be absolutely sure that now everything is working as intended, I checked some of the CUDA sample projects. The build process went more or less smoothly, only thing I had to do was to right-click the project in Visual Studio and to manually assign the actually installed Windows SDK to the project:
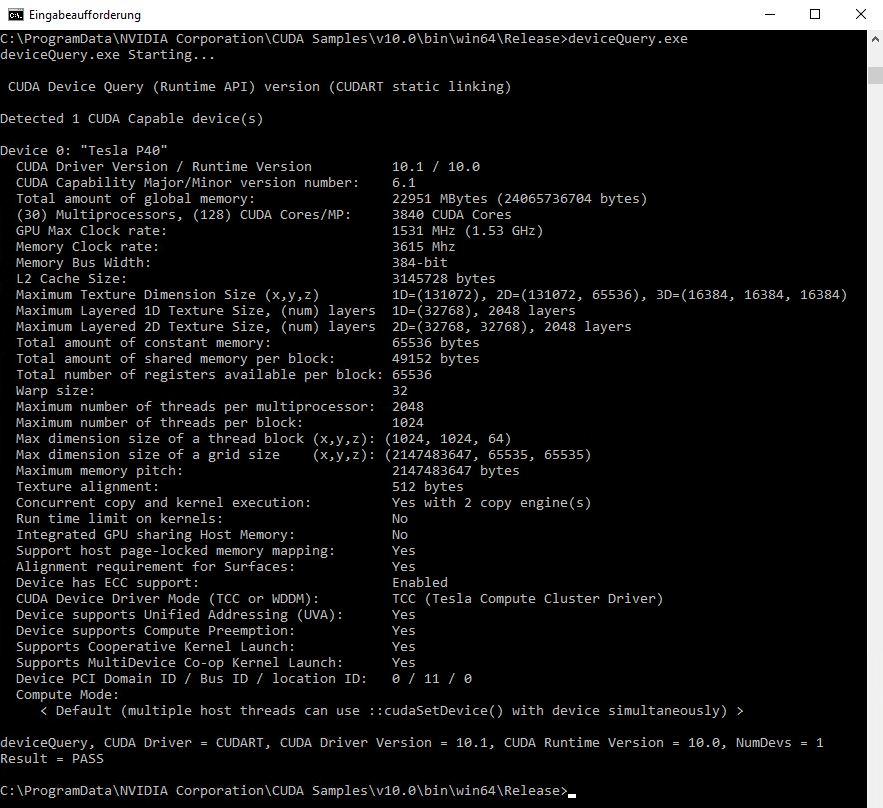
After building the project I checked the result and started the „deviceQuery.exe“:
Fortunately, a success at last :-).
Anaconda and Tensorflow-GPU
Based on my Python experience so far, I recommend to use Anaconda as Python distribution. However, following the guide on towardsdatascience.com I did not succeed to install the tensorflow-gpu package with pip via
pip install tensorflow-gpu
Starting Python with
import Tensorflow
led to lengthy error messages, here the brief version
ImportError: DLL load failed: The specified module could not be found
From my point of view Conda as package manager again demonstrates its usefulness because a simple
conda install tensorflow-gpu
not only installed the tensorflow-gpu package, but also all its dependencies in the required and (most important) correct versions. Finally
conda install keras
installs Keras, so after lots of trial and error I finally got the Tesla P40 GPU in our Dell R740 on an ESXi 6.5 host with a Windows 10 guest running in Direct Passthrough mode.
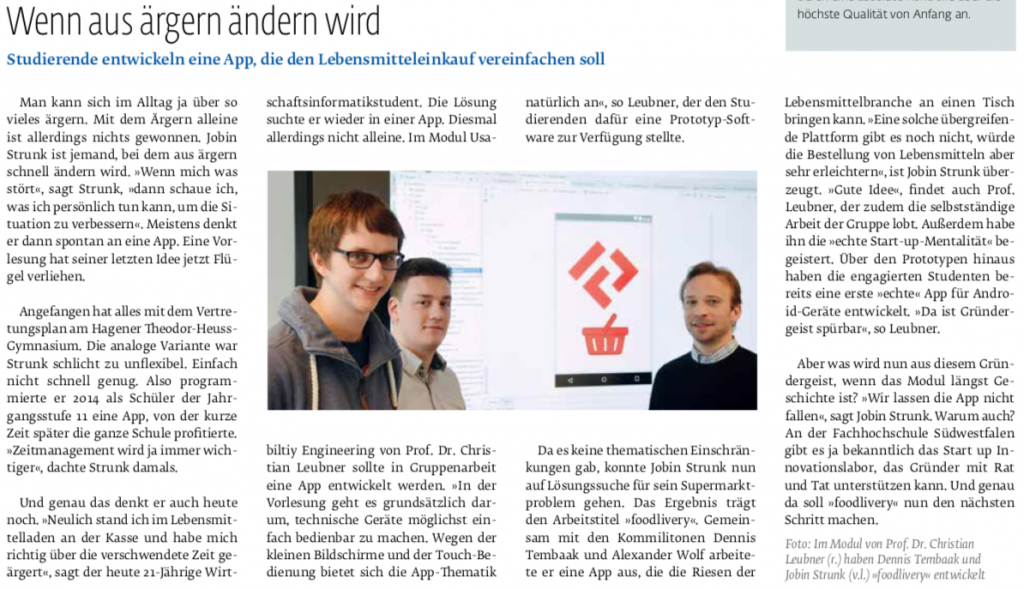
Ein aktueller Artikel in der Hochschulzeitung „impuls“ berichtet über die Entwicklung der App „Foodlivery“, die Studierende als Prototyp im Modul „Usability Engineering / Mensch-Computer-Interaktion“ entworfen haben und parallel im Modul „Informationsmanagement“ für Android-Apps auch funktionsfähig entwickelt haben.